
To upload audio to YouTube, add an MP3 or another supported audio file to Audioship, choose a picture or background, and publish to your connected channel. Audioship creates the video and uploads it to YouTube.
Can I upload an MP3 directly to YouTube?
YouTube channel uploads require a video file. An MP3 or WAV alone will not create a video; combine the audio with an image first. See YouTube's audio upload guidance. The steps below handle that conversion and publishing together.
Free includes 3 videos per month, up to 30 minutes each, with an Audioship watermark. You do not need a credit card to start. Check current plans for higher limits and watermark-free videos.
1. Choose where to publish
- Open Upload.
- Use Pick YouTube channel for upload to select one or more connected YouTube channels.
- If no channel is connected, select Connect YouTube channel and complete the Google connection flow.
- Resolve any YouTube status warnings before publishing.

2. Add audio files
- Select Upload audio, drag audio files into the upload workspace, or select Import from Drive.
- For Google Drive, connect the Drive account that contains the audio, choose one or more files in Google Picker, and select them. The Drive account may be different from your connected YouTube account, and shared-drive files are supported.
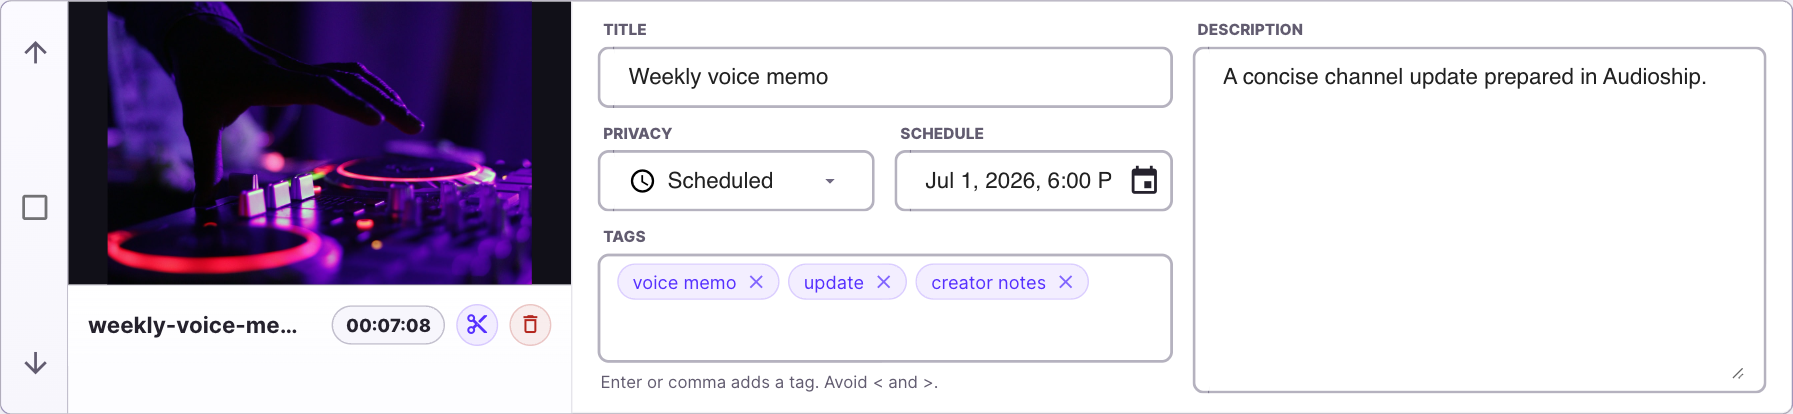
- You may select multiple files. Audioship creates a draft card for each file.
- Wait for the upload or import progress to finish. Drive imports continue on Audioship's servers if you close the tab. The Publish to YouTube action will not submit while audio is still importing.
Supported sources include MP3, WAV, M4A, AAC, FLAC, OGG, WMA, AIFF, OPUS, and common browser-recognized audio types. You can also select MP4, M4V, or MOV video; Audioship extracts its first audio track and ignores the original video. Free uploads are limited to 500 MB per file, and paid plans support files up to 10 GB per file.
For several files, follow the bulk audio upload guide. For cloud files, see how to import audio from Google Drive.
Uploading audio from an iPhone or Android phone
Open Audioship in your phone's browser and use the same Upload workspace. Save the recording as an audio file first; a link to a song in a streaming app is not an audio file.
iPhone: choose a recording from Files
- For a Voice Memos recording, open its sharing options and choose Save to Files. If export options are shown, choose Rendered for an M4A file. See Apple's instructions for exporting a recording.
- In Audioship, tap Upload audio and browse to the saved file. Look in the Files location you selected, such as On My iPhone or iCloud Drive. File-picker labels can vary by iOS version.
- Select the recording and keep the browser tab open until the file finishes uploading.
Android: choose a saved audio file
- Save or export the recording from your recorder app. Use your phone's file manager to check where it was saved; downloaded files are often in Downloads. See Google's guide to finding files on Android.
- In Audioship, tap Upload audio, browse to the recording, and select it. Your phone may offer an audio category or a file browser.
- Keep the tab open while the file uploads. If the recording is already in Google Drive, you can use Import from Drive instead.
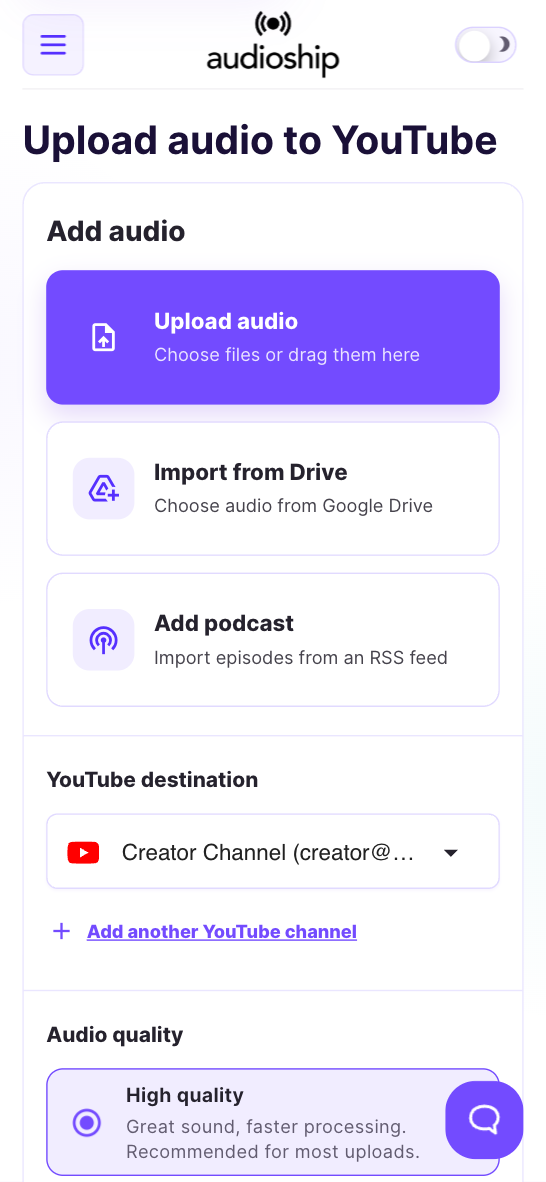
The image shows Audioship's mobile layout with an example account. Your phone's file picker may look different.
After adding the file, tap Edit video background on its draft card to choose artwork. Check the selected YouTube channel, title, and privacy before publishing. When the job finishes, open its YouTube link and check the video; YouTube processing may take a little longer. These controls are explained below.
3. Choose a picture or background
- Select Edit video background on a draft card.
- Choose from Your images, generated backgrounds, uploaded images, Motion backgrounds, or Stills.
- Upload a JPEG, PNG, GIF, or BMP image up to 20 MB if you want custom artwork.
- Select Use background to use it for the video.
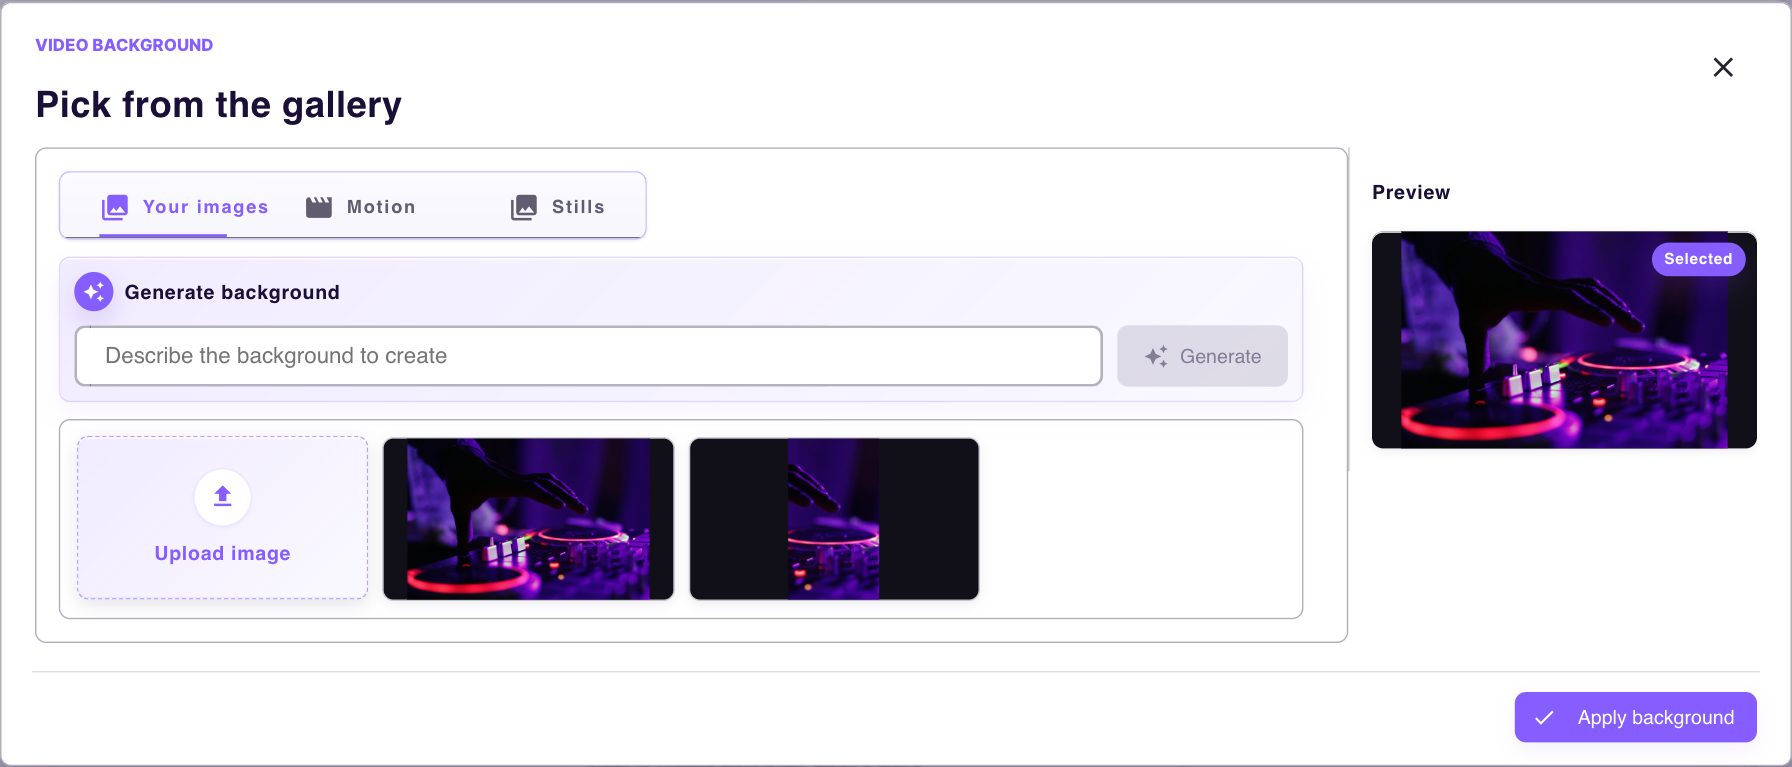
A 16:9 picture such as 1920 × 1080 is a useful starting point. See the background image size guide for artwork choices.
4. Edit YouTube details
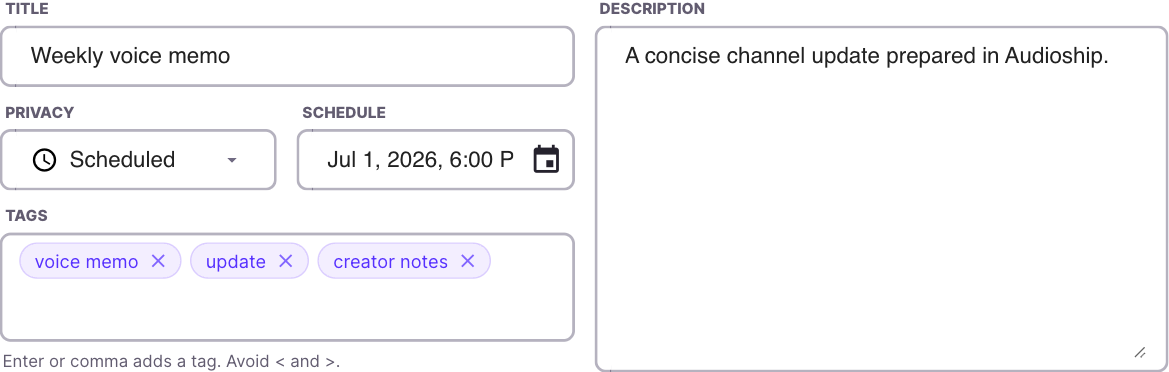
- Title is required and can be up to 100 characters.
- Description can be up to 5000 characters.
- Tags can be up to 500 characters and cannot include angle brackets.
- Privacy options are Public, Unlisted, Private, and Scheduled.
- If you select Scheduled, choose a future date and time.
5. Publish to YouTube
- Review selected channels, plan limits, background, metadata, and privacy.
- Select Publish to YouTube.
- In the Final review dialog, confirm the destinations, video details, privacy, and schedule, then select the purple Publish action. Free-plan uploads include the watermark shown in the upload controls.
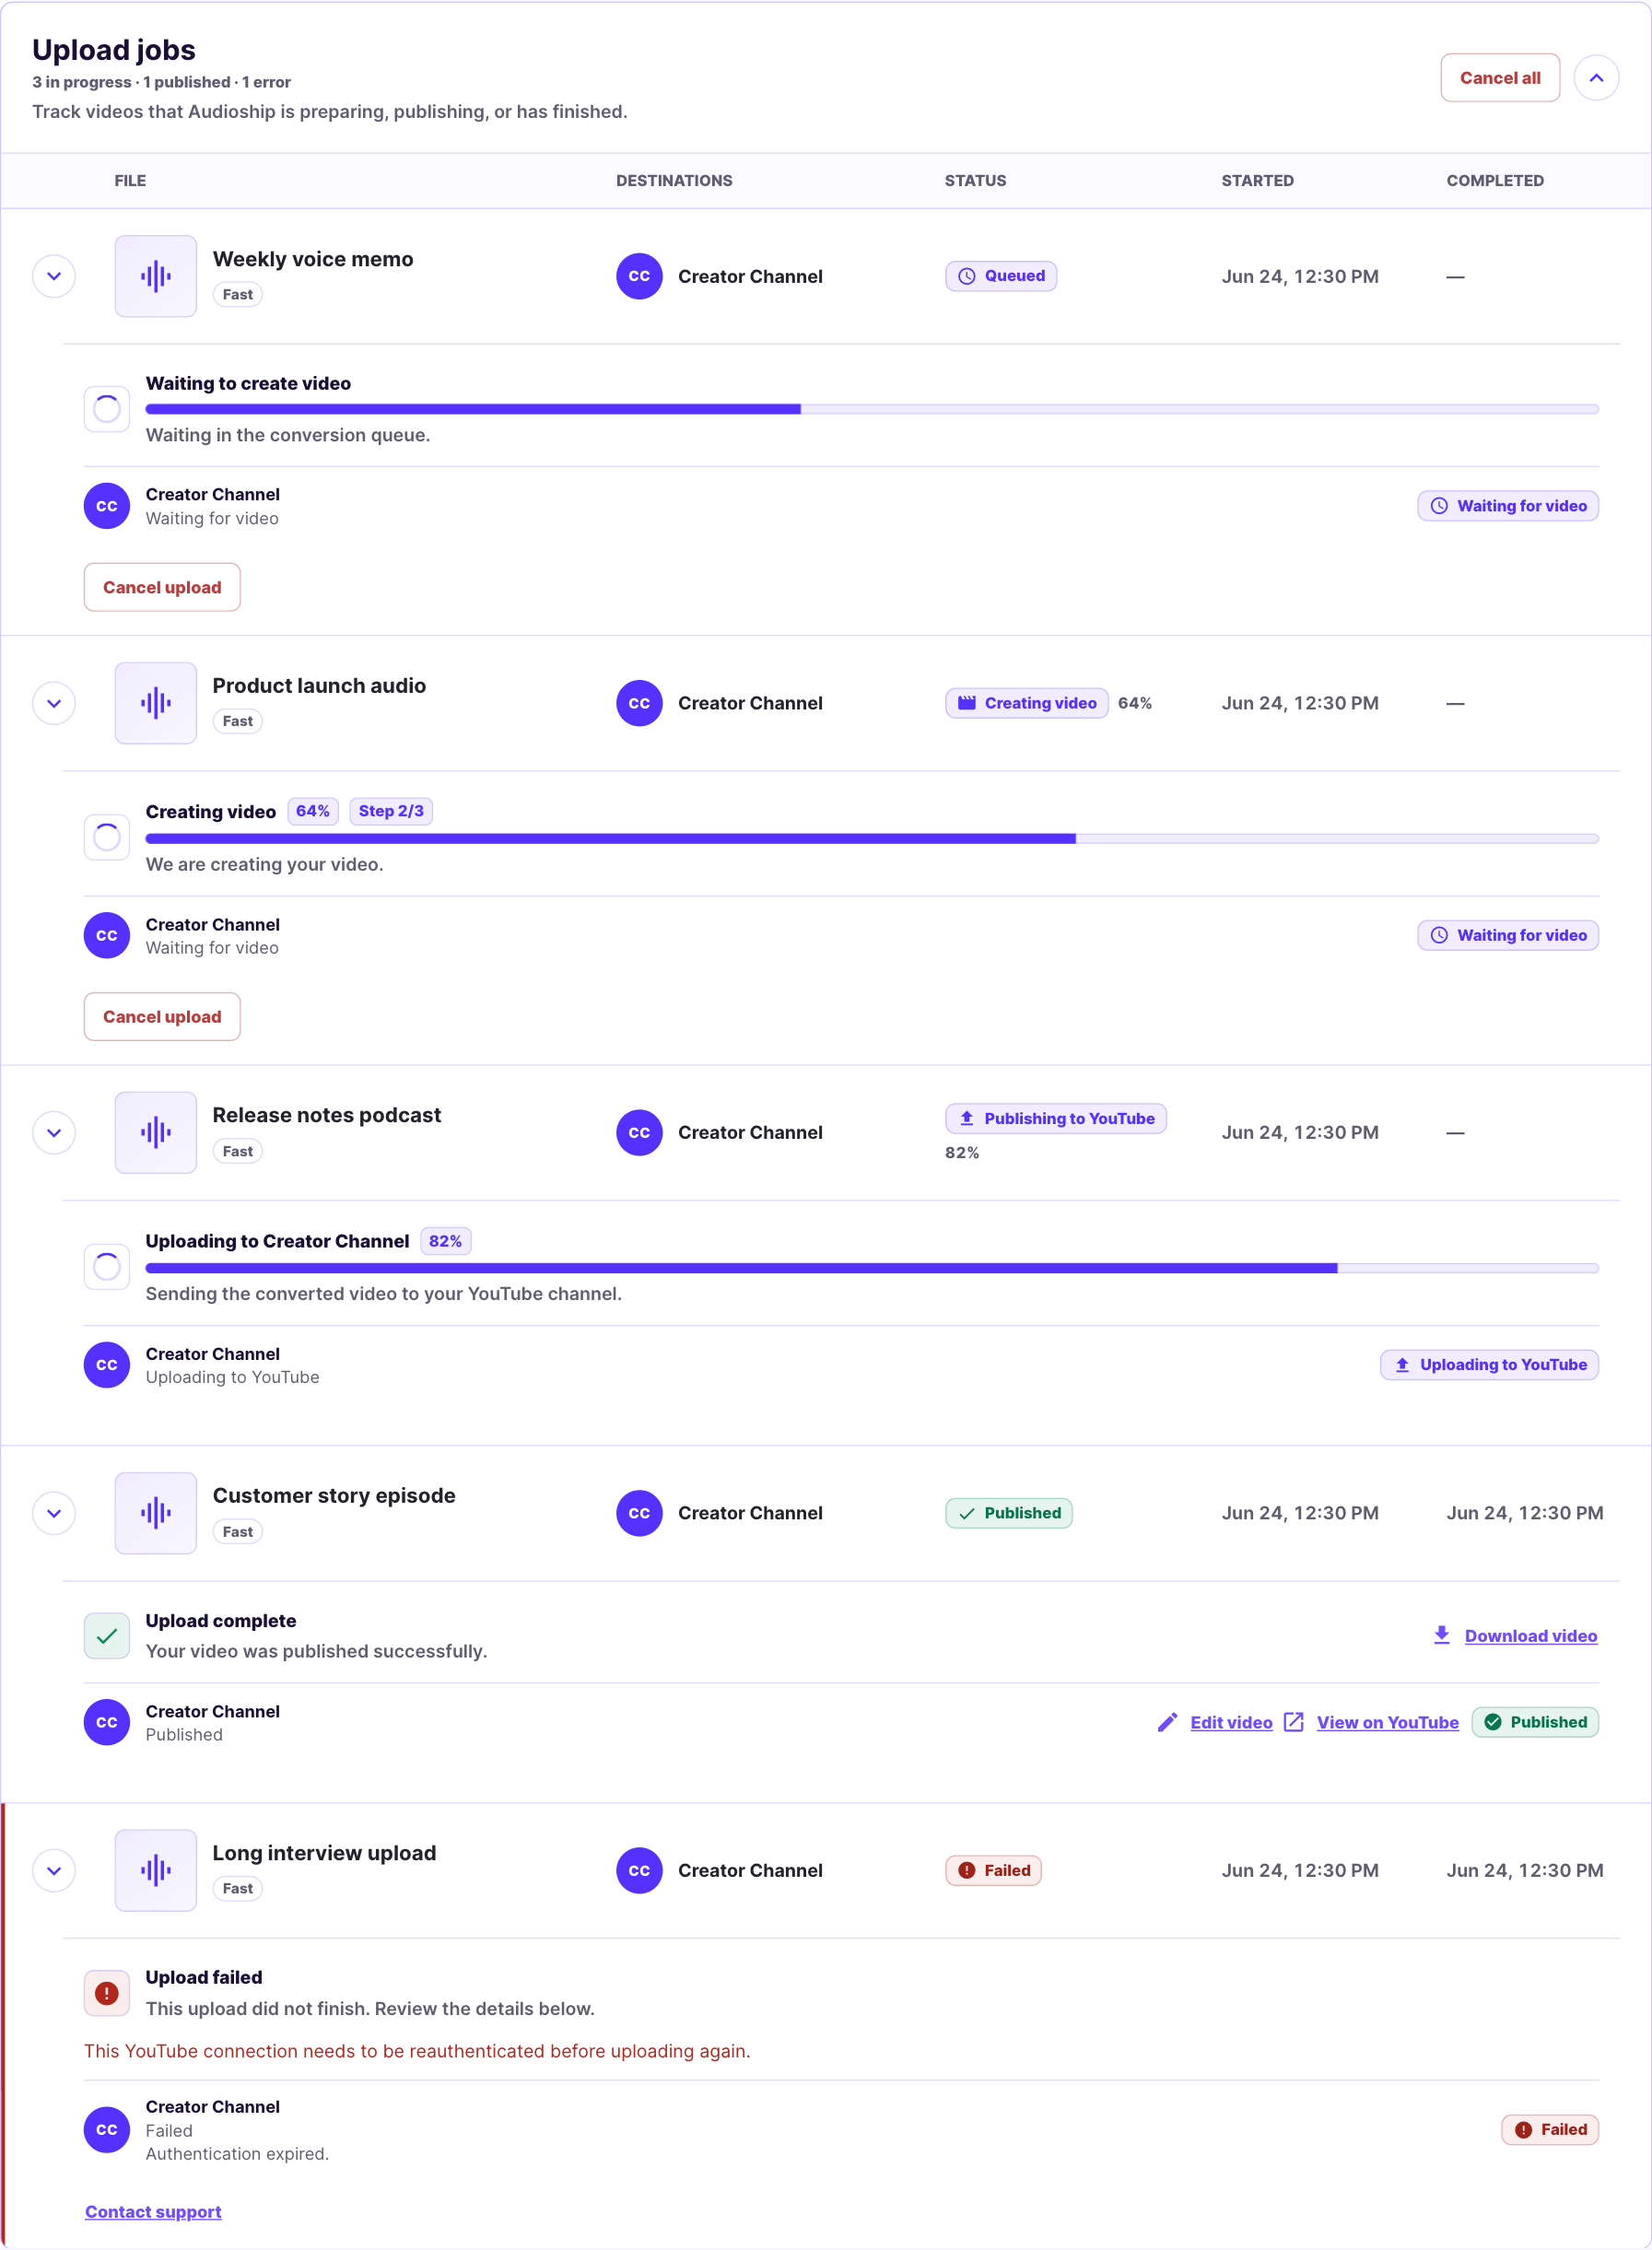
- Track active work under Upload jobs. Jobs that finish while the upload page is open stay there for quick access until you refresh; older completed, cancelled, and failed attempts remain in Account upload history.
- Each row shows when it started and displays Not completed until it finishes. Expand a row to see progress, results, or error details.
- When YouTube accepts the upload, Audioship shows the YouTube URL and an Edit video action.
YouTube may still need time to process the video after Audioship receives the URL. If playback is not ready immediately, wait and refresh the YouTube page.